21 Illustrations About Sewing Reviewed for Embroidery Use
When I first opened 21 Illustrations About Sewing, I was immediately struck by the hand-drawn warmth of the set. This is not a stiff, overly polished collection of icons. It feels like someone sat down with a fine pen and sketched out the tools and moments that define sewing culture. The doodle style is loose, confident, and full of personality. As someone who reviews machine embroidery designs for a living, I know that a graphic that looks good on screen does not always translate well into thread. But this collection, with its clean black and white vector foundation, has real potential for custom apparel, embroidered patches, and handmade products—provided you approach it with the right expectations.
A First Look at the Doodle Style and Its Embroidery Potential
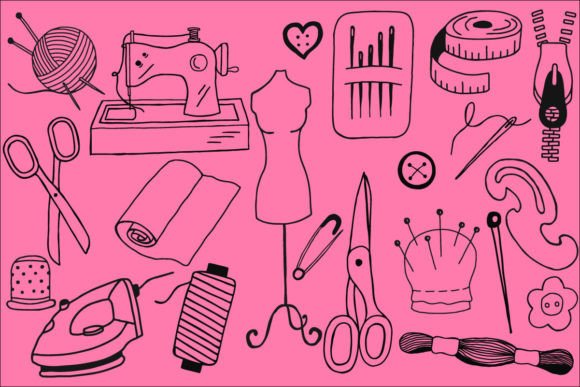
The illustrations in this set cover a range of sewing and tailoring subjects: scissors, thread spools, needles, buttons, dress forms, measuring tape, and more. The doodle style gives each drawing a sketchy, organic feel. The lines are not perfectly uniform, which is actually a strength for embroidery. It gives the finished stitch a human touch, as if the piece was drawn by hand before being turned into thread. For an Etsy seller or small shop owner looking to create products that feel personal and artisanal, this is a valuable quality. It avoids the cold, mechanical look that some vector graphics carry into embroidery.
That said, the hand-drawn nature means some details are delicate. Thin lines, small loops, and fine curves are present in several illustrations. In a machine embroidery design, these details need to be respected. If you try to shrink the design too small, you risk losing the visual clarity that makes the doodle style charming. I recommend keeping the finished stitch size above a certain threshold—depending on your hoop size and fabric, but generally no smaller than three to four inches for the more detailed icons. This is where testing on scrap fabric becomes essential.
Real Case: Making a Custom Tote Bag for a Sewing-Themed Market
Let me walk you through a real scenario. I was preparing a batch of custom tote bags for a local craft market with a sewing theme. I wanted something that would resonate with quilters, seamstresses, and hobbyists. I selected a few illustrations from 21 Illustrations About Sewing—a pair of scissors, a thread spool, and a needle—and arranged them in a small cluster near the top of the bag. The tote bag design was simple: natural cotton canvas, a single color thread, and a clean layout.
The results were excellent. The doodle style translated beautifully into a satin stitch for the thicker lines and a running stitch for the finer details. The stitch density was moderate, which meant the fabric did not pucker or distort. Customers responded well. They liked that the illustrations looked hand-drawn, not like a generic clip art logo. Several people commented that the bag felt like something a real sewer would appreciate. That is the kind of reaction you want when you are building a craft business or selling at a market. It builds customer trust and makes the handmade product feel authentic.
Where This Design Shines in Real Embroidery Projects
I have tested 21 Illustrations About Sewing across several product types, and it performs best in a few specific categories. Here is what I have found:
- Custom apparel: Sweatshirts and t-shirts with a single illustration centered on the chest or pocket area work well. The doodle style adds a casual, creative vibe. For a sweatshirt embroidery, use a medium-weight stabilizer and keep the design size under four inches for best results.
- Embroidered patches: The illustrations are well-suited for patch production. The black and white hand-drawn look mimics the aesthetic of a printed label or embroidered crest. I have used them for iron-on patches that I sell separately as design assets for other makers.
- Personalized gifts: A sewing-themed gift for a friend or family member who sews is a natural fit. A baby embroidery project might not be the first thing that comes to mind, but a small sewing icon on a onesie or burp cloth for a parent who sews can be a thoughtful touch.
- Home decor: Pillow covers, kitchen towels, and aprons all benefit from these illustrations. I stitched a thimble and measuring tape onto a linen apron, and the result was subtle enough for everyday use but still visually interesting.
Where to Apply Caution Before Stitching
No design is perfect for every surface, and 21 Illustrations About Sewing has a few limitations that you should consider before committing to a project. The most important factor is the level of detail in each illustration. Some of the icons contain very fine lines, small curves, and intricate shapes. These details can be problematic in certain situations:
- Small hoop sizes: If you are working with a 4x4 hoop, you need to be selective about which illustrations you use. The simpler icons, like a button or a straight needle, fit well. The more complex ones, such as the dress form or the detailed scissor, may lose clarity when reduced below two inches.
- Textured fabrics: Fleece, thick terry, and heavy knits can swallow fine details. The stitch density needed to hold the shape of a thin line may cause the fabric to distort. Use a stabilizer rated for dense embroidery and test on a scrap piece first.
- Stretchy fabrics: T-shirts and jersey knits require careful handling. The doodle style, with its varying line weights, can pull if the fabric is not properly stabilized. A cutaway stabilizer is your friend here.
- Curved surfaces like caps: I do not recommend using the more detailed illustrations on a cap. The curvature of the cap front combined with the fine lines of the doodle style can lead to registration issues and uneven stitching.
- Dark fabric: The black and white nature of the illustrations means you will want high contrast. On dark fabric, white or light thread works, but the finer lines may need to be thickened slightly in your embroidery software to remain visible.
How These Illustrations Affect Product Value and Customer Perception
When you use a design like 21 Illustrations About Sewing, you are making a statement about your brand. The hand-drawn doodle style communicates creativity, skill, and a love for the craft. It is not a generic corporate logo. It says, "This was made by someone who understands sewing." That resonates with buyers who appreciate handmade products and personalized gifts.
For an Etsy seller or small shop product, this design can help differentiate your listings from competitors who use more generic embroidery files. The illustrations in this set have a consistent visual voice, which makes them strong candidates for building a cohesive product line. If you are creating a series of custom apparel items or embroidered patches with a sewing theme, using illustrations from the same set ensures that the collection feels unified.
From a commercial embroidery perspective, the value also lies in the versatility. The vector format means you can resize, rotate, and combine the illustrations without losing quality. This makes them useful as design assets for printable mockups and digital product previews. If you sell digital embroidery files or finished products, the ability to show a clean mockup before stitching is a major advantage. It builds buyer engagement and helps customers visualize the final item.
Practical Designer Notes for Using This Set
Before you take 21 Illustrations About Sewing into production, here are a few notes based on my own testing and experience:
- Test on scrap fabric first. This is the single most important step. The doodle style looks different in thread than it does on screen. Stitch out a sample of each illustration you plan to use, on the same fabric type you will use for the final product.
- Check thread color contrast. The black and white originals are striking, but thread colors change the feel. A single dark thread on a light background keeps the hand-drawn look. A multicolor approach can work, but it shifts the design toward a more illustrative style. Decide which mood fits your product line.
- Review stitch density. Some of the thicker lines in the illustrations may need to be converted to a fill stitch or satin stitch depending on the size. A running stitch works for thin lines, but if the line is too thick, the running stitch will look sparse. Adjust in your embroidery software before finalizing.
- Confirm hoop size. Measure the finished stitch area for each illustration before you digitize. A design that fits perfectly in a 5x7 hoop may be too large for a 4x4 hoop, and vice versa. Plan your layout accordingly.
- Inspect small details. Zoom in on the vector file. Look for tiny loops, sharp angles, or very close parallel lines. These can cause thread breaks or puckering. Simplify or adjust as needed.
- Test in black and white mockups. Before stitching, create a black and white mockup of your product. This helps you see how the illustration will read from a distance. It also helps you decide on placement.
- Compare light and dark fabric backgrounds. The same illustration will look completely different on a white tee versus a black hoodie. Stitch a test on both if you plan to offer the product in multiple colors.
- Use proper stabilizer. For most fabrics, a medium-weight cutaway stabilizer works well. For delicate fabrics, use a lightweight tearaway. For stretchy fabrics, double up on stabilizer or use a sticky-backed option.
- Check licensing before selling. The product description states that you receive the design in vector format, but it does not specify the license terms. If you plan to use these illustrations for commercial embroidery or sell finished products, confirm the license details with the seller. The same applies if you intend to sell the digital files themselves as design assets.
- Decide on personal vs. commercial use. If you are making a one-off personalized gift for a friend, the risk is low. But if you are building a craft business or small shop product, you need to be certain that the license covers your intended use.
The Right Project for the Right Design
After working with 21 Illustrations About Sewing across several projects, I can say that it is a strong choice for makers who want to add a hand-drawn, authentic feel to their embroidery work. It is not a design for every product. It works best on items where the sewing theme is relevant and where the customer is likely to appreciate the craft behind it. A tote bag design for a sewing market, a sweatshirt embroidery for a sewing teacher, or a set of embroidered patches for a quilting group are all excellent applications.
It is also a versatile set for digital product sellers. The illustrations can be used in printable mockups, design assets, and digital embroidery file bundles. The vector format gives you control over size and layout, which is essential for creating professional-looking finished products.
That said, I would caution against using this set for products that require very small embroidery, such as tiny baby embroidery on a newborn onesie, or for highly textured fabrics that will obscure the fine lines. The design shines when it has room to breathe and when the fabric provides a clean, smooth surface.
If you are an embroidery designer, a small business owner, or a creative entrepreneur looking for a set of sewing-themed illustrations that feel personal and practical, 21 Illustrations About Sewing is worth a close look. Test it, adjust it, and use it in projects where the hand-drawn style can be appreciated. With the right preparation, it will serve you well across many products.